
Breakout rooms are very useful tool for small-group discussion or project work within a class period, but they can be complicated to set up in the middle of a Zoom meeting. The easiest solution is to allow students to choose their own breakout rooms, but you can also pre-assign students to breakout rooms beforehand. Pre-assignment requires you and your students to do a little work in advance.
Note: Many of these features are not available without an updated Zoom client. See our guide on Updating your Zoom Client to ensure you have access to all features describe here.
Setting Up Breakout Rooms in Advance #
If you are going to be using breakout rooms regularly throughout your class, you may want to set the breakout rooms up in advance. Follow these steps to get your rooms set up:
- Create your recurring class meetings as you normally would (this is most easily done in Canvas. See our guide on Using Zoom in Canvas for more information)
- Sign in to the UMW Zoom Web portal at umw-sso/zoom/us (see our guide on Creating and Logging into Your UMW Zoom Account for more information)
- Locate the meeting you have just created, and click Edit, then Edit All Occurrences
- Scroll down to “Meeting Options,” and check the box next to Breakout room pre-assign
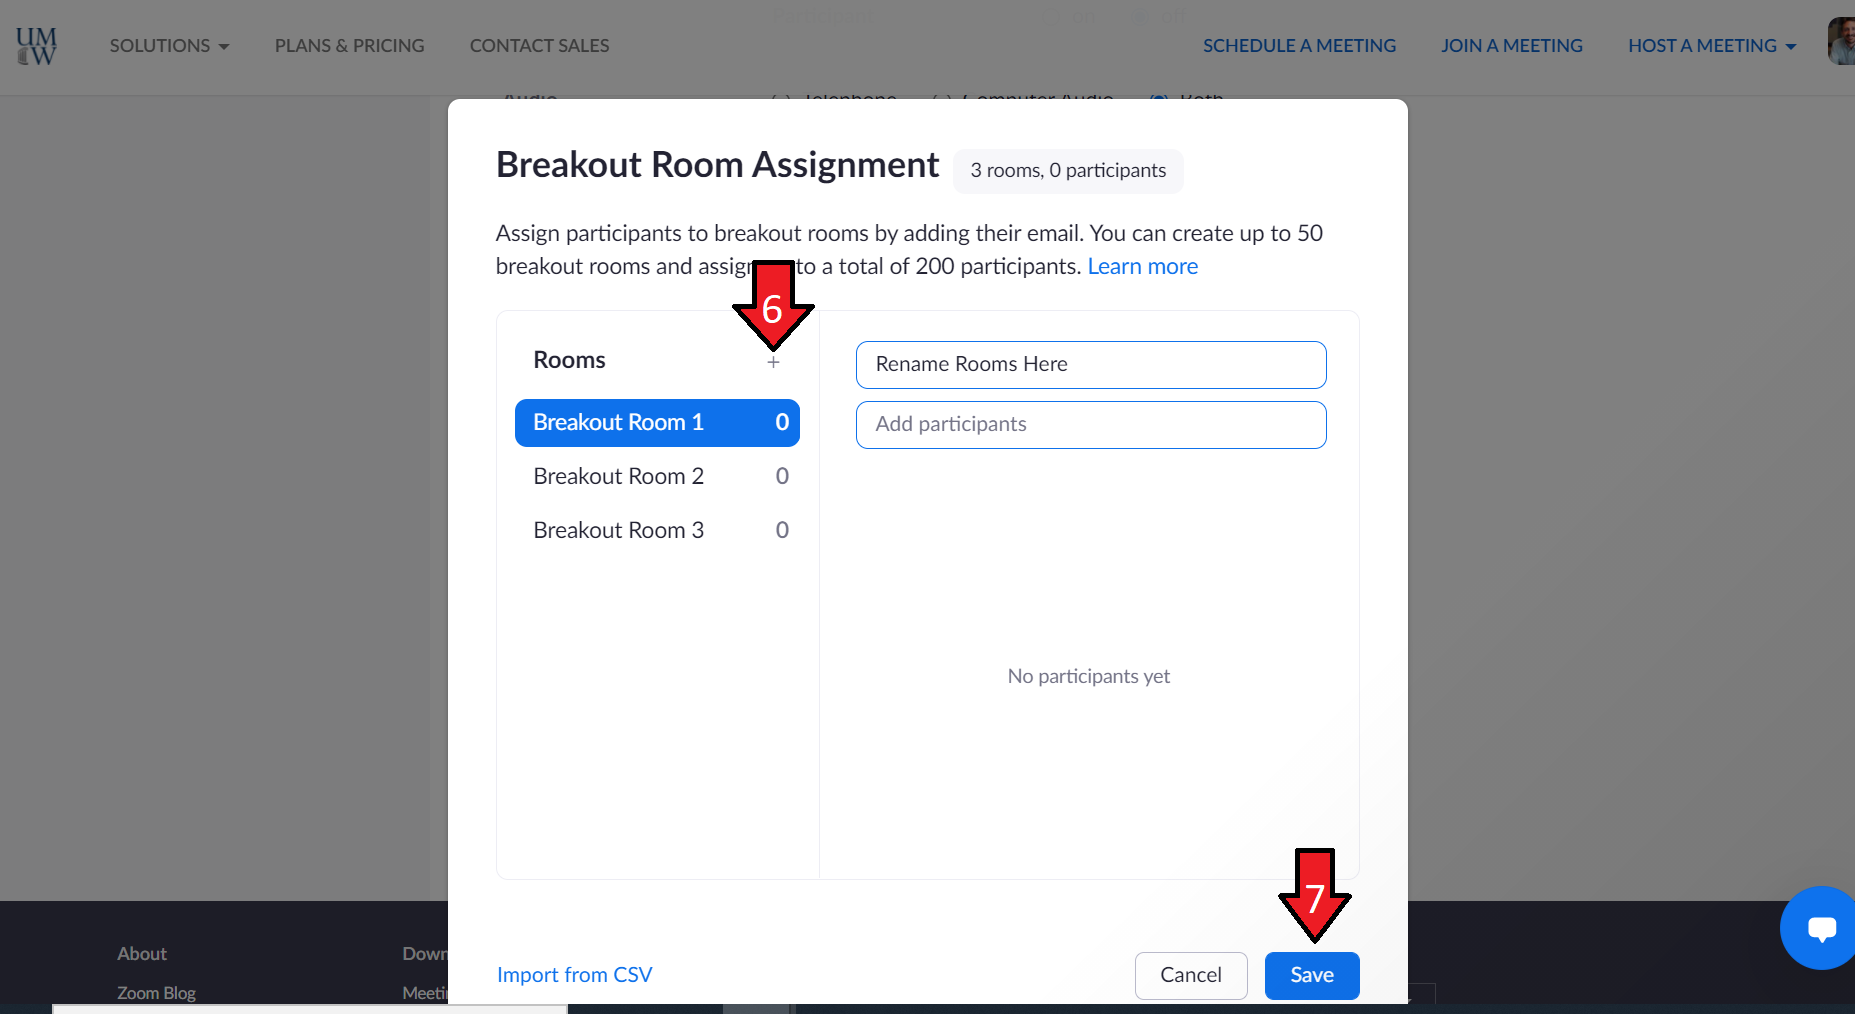
- Click + Create Rooms
- Click the + button to add as many breakout rooms as you need. Optionally, you can click on each breakout room and edit the room name using the box that appears on the right.
- Click Save in the Breakout Room box
- Click Save in the Edit Meeting screen

Allow Students to Choose Their Own Breakout Room #
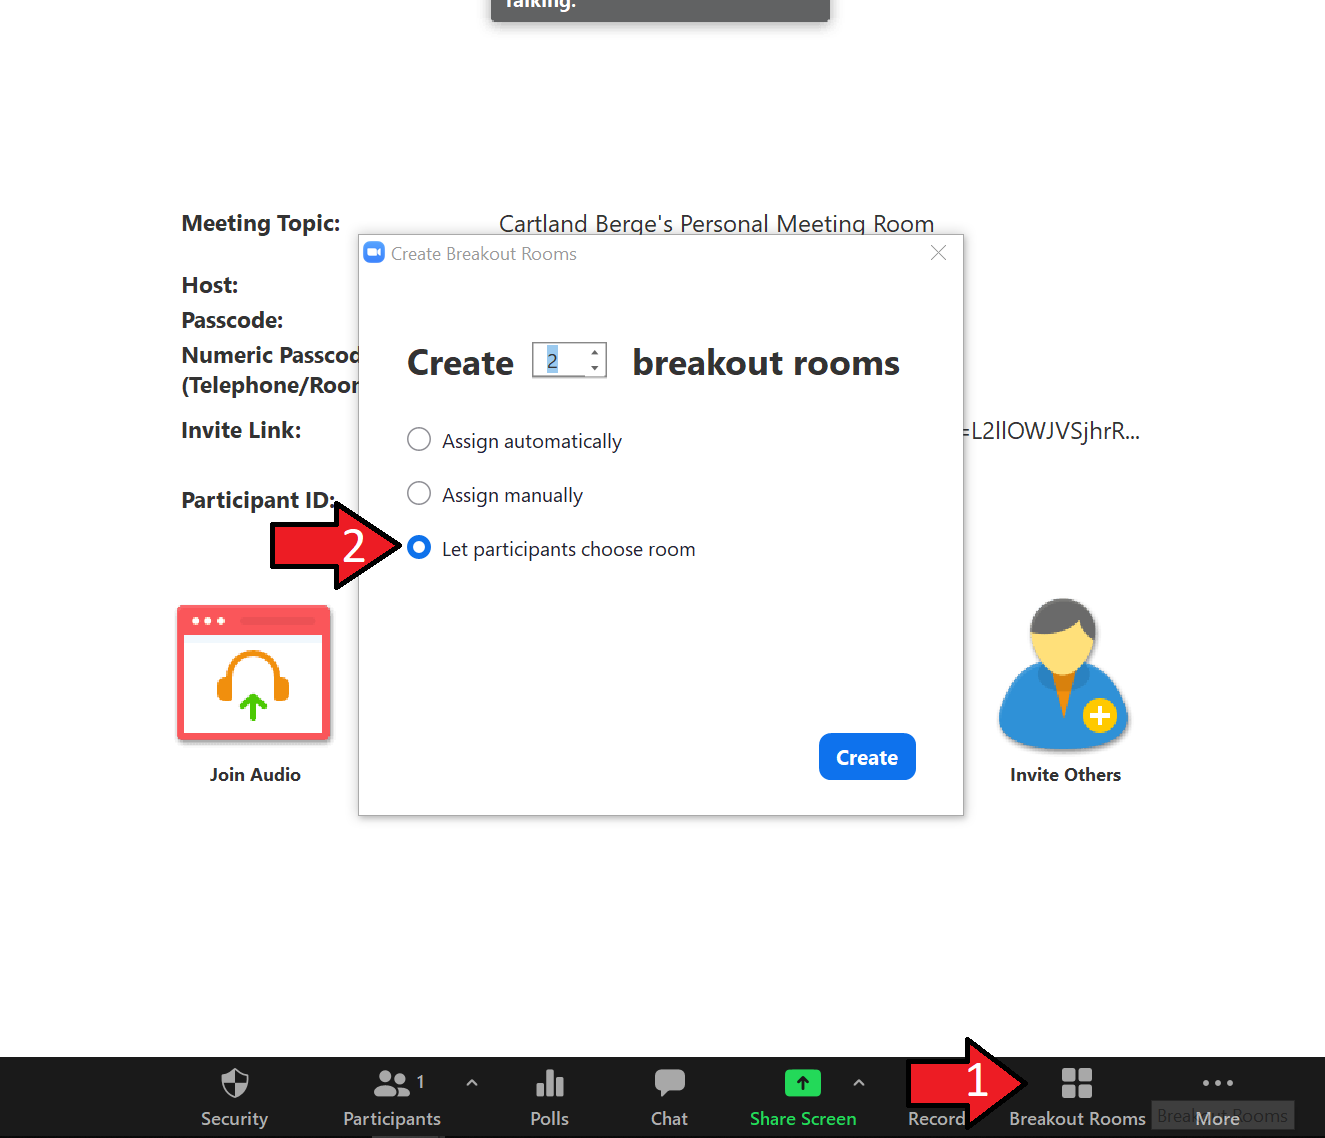
Zoom now has the option to allow participants to choose their own breakout room. Using this option, you could simply share instructions (via Canvas, in a Word doc, Excel spreadsheet, etc.) telling students which room they should join, bypassing all of the set-up and authentication issues that pre-assignment requires. You can select this option when creating the breakout rooms in your meeting.
Pre-Assigning Breakout Rooms #
Pre-assigning breakout rooms will mean that your students will automatically go into pre-determined rooms. This can be very useful, but requires some preparation.
Prepping Your Students #
For pre-assignments to work, students will need to create, and be logged into, their UMW Zoom account before joining the meeting.
Note that logging into Canvas does not automatically log your students into their Zoom account. You may want to direct students to our guide on Creating and Logging into Your UMW Zoom Account.
Creating Your Meeting #
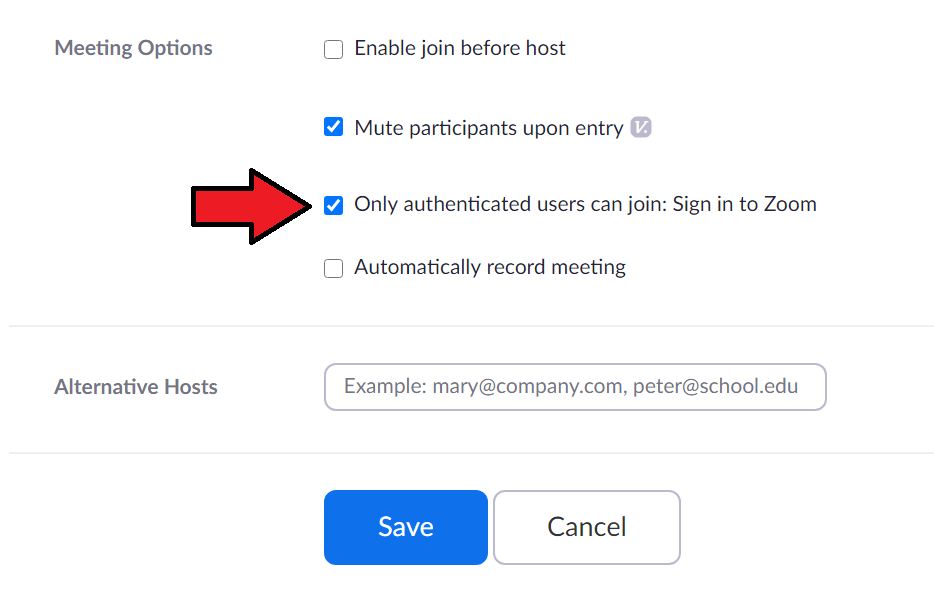
To ensure your students are logged into their account when joining the meeting, you can enable “Only authenticated users can join” under Meeting Options when creating your meeting. This will require all students to sign into their UMW Zoom account before joining the meeting.
Note that enabling this feature will require students to log into Zoom using the desktop client or the mobile app. The web version of Zoom is not supported when authentication is turned on.
Setting Up Pre-assignments #
With the above prerequisites in place, you are ready to create and pre-assign your breakout rooms. Zoom has a detailed guide on pre-assigning breakout rooms in their support documentation.
Note that you must use students’ @mail.umw.edu email address to link the breakout room assignments with their UMW Zoom accounts.