
ScreenPal is a tool that allows you to record what’s happening on your computer screen, as well as video and audio via your computer’s built-in webcam and microphone. This is a useful tool for recording lectures to share with students online, especially if the lecture includes PowerPoint slides or other visual aids. It also includes digital accessibility features to create captions and audio descriptions.
Things to Know #
- UMW has a ScreenPal Team Plan that provides access for all active faculty, students, and staff. This plan includes premium features to make recording, editing, storing, and sharing videos easier (most notably auto-captioning, audio descriptions, and cloud storage).
- Short videos (15 minutes or less) are easier to manage on your end, and easier for your audience to navigate. If you are recording a longer video, consider breaking the lecture down into smaller sections by topic. If you would usually pause for questions or discussion, this may be a good time to stop the recording and start a new one.
- See our Filming Recommendations page for general tips on filming a high-quality video.
Getting Started #
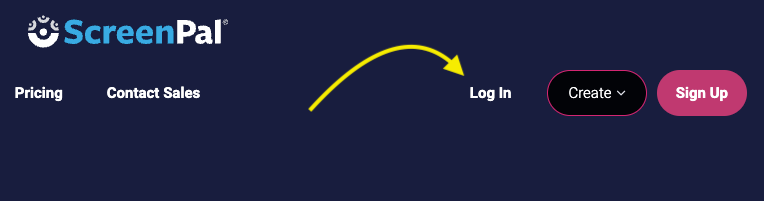
- To create an account, or to log in to an existing account, go to the ScreenPal login page (screenpal.com/umwscreencasting) and use your UMW Microsoft 365 email address and NetID password.
- Once logged in, you will have access to the ScreenPal dashboard. On the dashboard you have several options, including My Videos, Launch Recorder, Edit Video, and Upload Content.
- The first time you click “Launch Recorder” the ScreenPal application will download.
- Click the application to install. You may need to “Allow” ScreenPal to access your microphone and webcam. Once installation is complete, you are ready to start recording.
Recording #
ScreenPal can record what’s on your screen, what’s on your computer’s camera, or both. To start recording:
- Open the applications you would like to use in your recording (e.g. PowerPoint, internet browser, etc.),
- Click the red Rec button to begin the recording.
- When you are finished, click the Pause button, and then click Done.
From here, you are ready to edit, caption, and share your video.
For more information on the recording process, watch ScreenPal’s short intro video below
NOTE: We recommend you upload your videos to your ScreenPal library so you can take advantage of the AI Captioning and Audio Description features. You can certainly save or upload to other platforms, but to be compliant with Title II digital accessibility rules, you must include edited captions and audio descriptions as applicable.
Editing #
Once your recording is finished, you can easily edit the video using ScreenPal’s built in video editor. The editor includes many features including trimming, cutting, transitions, adjusting speed and volume, overlays, inserting audio and video.
For more help with the video editor in general see:
There is also an Online Video Editor that can be useful if you’ve already uploaded a video to the ScreenPal hosting and you need to do additional editing after you’ve published the video. See ScreenPal’s guide on how to access the Online Video Editor for more details and the Get Started with the Online Video Editor for a demo.
AI Captions and Audio Descriptions #
To ensure your videos are accessible to all your students (and in compliance with federal Title II digital accessibility rules), it is important that all videos include accurate closed captions and audio descriptions as applicable. UMW’s ScreenPal license includes an AI feature to generate captions and audio descriptions, but they must be reviewed and edited for accuracy.
NOTE: These AI captioning features are only available on the web-based platform, not in the downloaded client.
First, go to ScreenPal.com and log in.
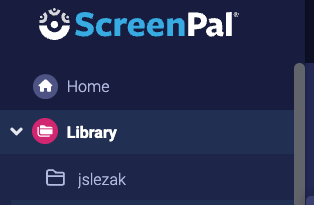
Then, go to your Library.
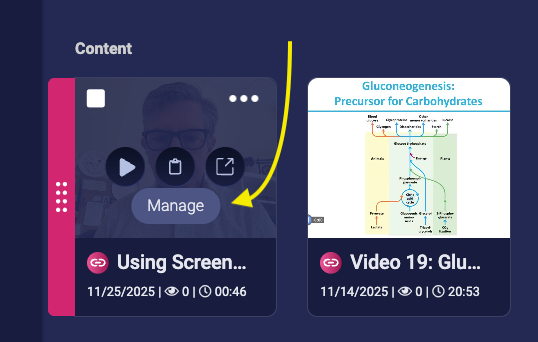
Next, choose a video and click the “Manage” button.
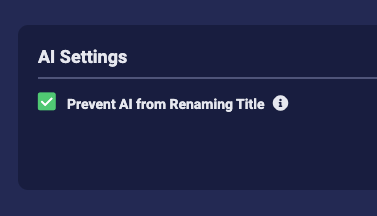
Optional Step: To prevent the AI from renaming your video titles do the following:
Click the icon next to Video Settings.
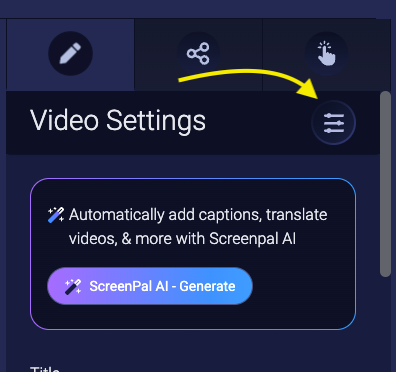
Check the box, then click “Save” to prevent
Next, click the ScreenPal AI Generate button.
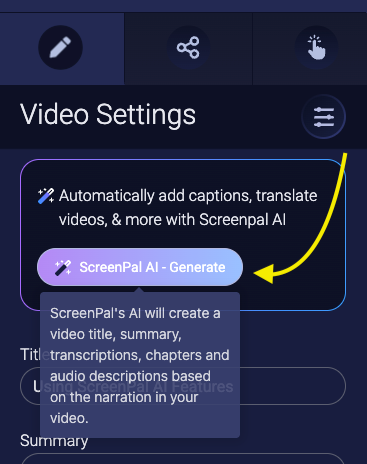
Once it is done (may take a while depending on the length of the video), these buttons will appear. Note, “AD” Audio Description button may take a while to turn blue – this takes longer than the others to generate. You can click these buttons to toggle them on or off – that affects what you see in the area below the buttons.
You should now review and edit the AI-generated content. You can move timings for captions by changing the time in the script next to the caption that might be a little off.
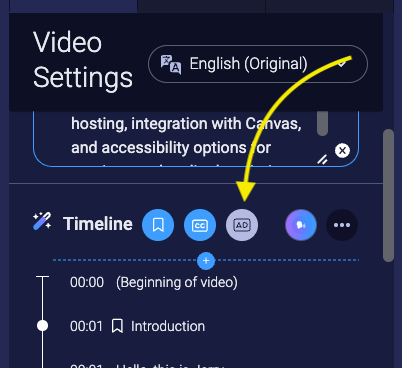
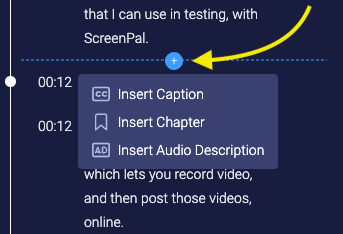
You can also insert new captions, chapters, or audio descriptions anywhere by clicking the “+” button.
More information about video accessibility see:
- ScreenPal’s accessible video captions guide
- ScreenPal’s adding audio descriptions to video guide
- UMW’s Teaching & Learning Resources Accessible Recorded Presentation & Videos guide
- UMW screencast of Using the AI captions and audio description
Publishing, Sharing, and Privacy #
The easiest way to share videos with your students is by uploading them to UMW’s ScreenPal Hosting, and then sharing the link with your students.
When publishing videos, you can set videos to be publicly searchable on the internet, accessible only via the direct link you share, or password protected.
For more details on publishing, sharing, and privacy settings, see the video below:
Especially if you are uploading videos for more than one class, it may help to create channels that will keep your content organized (by making a channel for each class, for example).
For an explanation of channels that includes a video demo see:
ScreenPal’s Video Channels Guide
Posting Your Videos in Canvas #
ScreenPal is integrated with Canvas to allow easy posting of your videos.
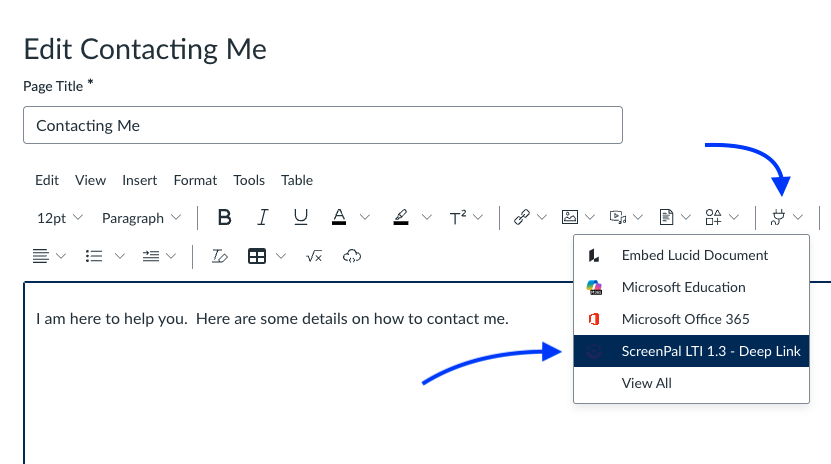
First, go to the course page where you want to insert the video, and then edit the page and move your cursor to the location where you want the video to appear on the page.

Next, click on the “Plug” icon, then choose “ScreenPal LTI 1.3 Deep Link” from the menu
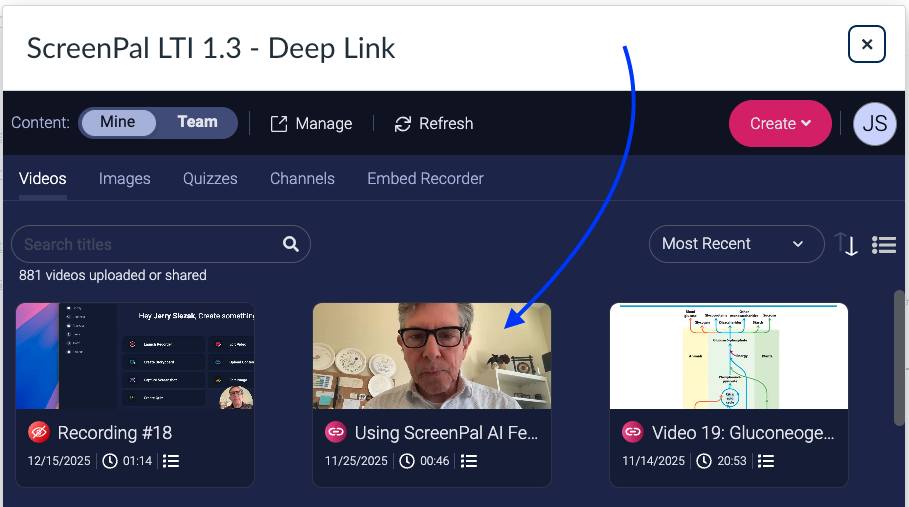
Your ScreenPal library will open. Navigate to the video you want to insert in the page and click on it.
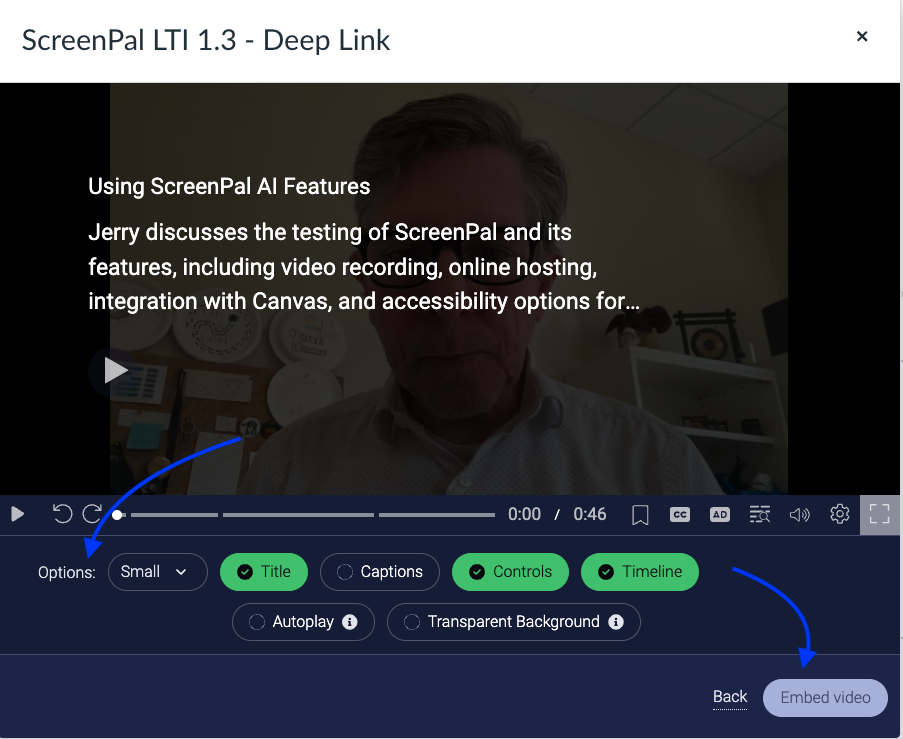
Now, choose the options you want for the video:
- Size: Small, Medium, Large, or Full Size
- Title: Check if you want the title displayed
- Captions: Check if you want the closed captions ON by default
- Controls: Check if you want to include the controls
- Timeline: Check if you want to include the timeline
- Autoplay: We recommend you leave this unchecked and allow the viewer to start the video when they are ready.
- Transparent Background: This is an aesthetic choice.
Once you have selected your options, click the “Embed Video” button.
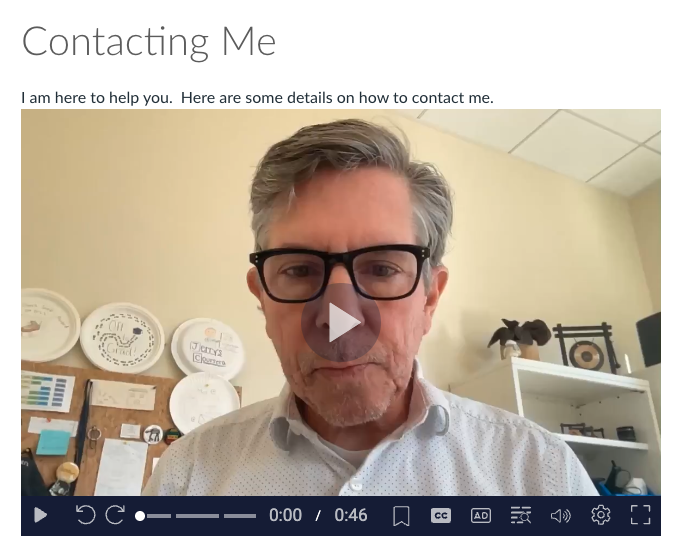
Finish making any other edits you want to the Canvas page, and then click “Save” at the bottom of the page.
You should now see your video embedded on the page.
Importing Media Recorded Outside of ScreenPal #
You can import and share videos and images that you have recorded outside of ScreenPal as well. These can be edited into your screencast videos or uploaded as whole videos.
For more information on the import process, see the video below:
Secure Backup #
Screen recordings can consume large amounts of storage and become difficult to manage over time. With the backup and restore feature, your content is saved online. This backup is private to you and is separate from where you share videos publicly.
Backup creates a copy of your video file and stores it online or in the ‘cloud.’ Restore is the process of recovering the copy of your video file onto a device. There are two ways to backup your content online:
- First, head to your Project Manager for a list of your recordings and videos.
- To back up an individual recording, click on the video. You’ll notice ‘Backup’ on the upper right-hand corner. Click ‘Add Backup’ to store it online.
- To backup multiple recordings, head back to the list of your recordings in the Content Manager. Click on ‘Manage Recordings’ and check off the recordings or videos you would like to backup. Then click ‘Add’ to store it online.
A full detailed tutorial is located in on ScreenPal Tutorials page.
Desktop App #
If you plan on using ScreenPal frequently or would also like to be able to use the application without an internet connection, we recommend you download the standalone application to your computer.
For detailed instructions follow this ScreenPal guide on how to install the app on a Mac or PC.
Please note that after you download the desktop application and launch it the first time you may be prompted to select and plan and access code. In order to connect your ScreenPal account to the desktop account you’ll want to do the following:
- Close out of the desktop editor
- Go to ScreenPal.com and login
- Launch the video editor from the button in the upper right-hand corner of the dashboard.
- After launching you can close the editor.
- Go back to the ScreenPal icon on your own computer and launch the local application. You should now be authenticated into your ScreenPal account.
Mobile App #
ScreenPal also offers a mobile app. This could be useful for recording yourself, or a PowerPoint slideshow on your phone.
For brief overview of the mobile app, see the videos below:

Moving from free account to premium version #
If you’ve used ScreenPal with a free account (using your UMW e-mail) you may encounter some issues when moving to the premium version. Here is basic troubleshooting to try if you find you are not seeing the premium features:
- Log-out of ScreenPal completely in any browser you may have logged in to with your ScreenPal account.
- Clear your cache/cookies on your browser. If you’re not sure how to do that this guide covers all major browsers.
If your problems still persist you can e-mail Digital Learning Support at dls@umw.edu or reach out to use through our contact form.
ScreenPal Provided Support #
If you are having issues with ScreenPal, ScreenPal’s Support page includes guides and a way to create a support ticket.
Updated by Shannon Hauser 03/02/26